|
Coloring Tutorial #1
|
For
this tutorial, you must have Photoshop 5.5, a graphic tablet with presure
sencitive. And a desire of learning :) well may be you don't need the last
one. |
|
|
Read
Please!
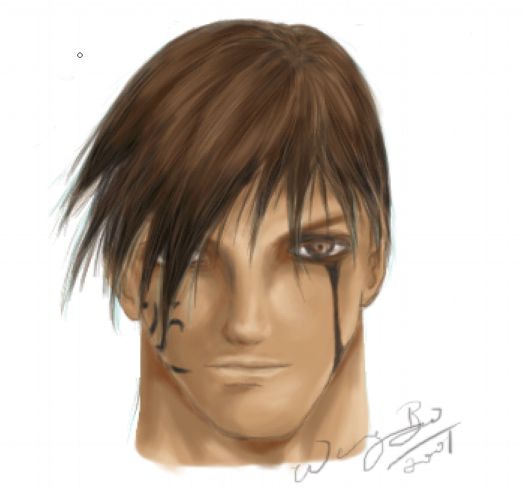
I will show you how I did this paint
here, and hope can give you the ideas of coloring, and hope it's helpful
to you.
This tutorial showing you the idea, and
steps of coloring, not teach you how to color so beautiful, that is up to
you to practice. Well, as you notice, this drawing isn't the one below.
I did a little change on the hair, and neck, that's all, so you see as you
going along with the steps. I am showing the full screem of my work area
on computer, I just figured it's easier for people to follow!
Click here for final view.
|
|
|
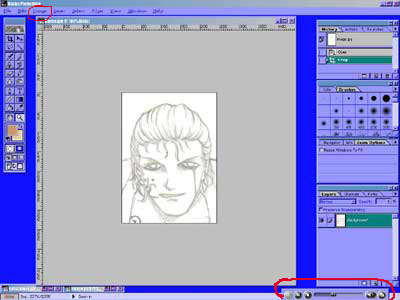
First
of all, have the sketch ready, and use 300dip scan it in to your computer,
save it. Then make a new lay, but stay on the background layer. Now, go
to Channal, and click load section, then back to your background layer,
and hit DEL key on your keyboard, then select the new layer you just made,
and hit inverse(Shift-Ctril+I), and use paintbrush with a dark color, to
paint it it over. <Remember, don not deselect your drawing or it won't
work> after you paint it, you will have a clean sheet of transpacy outline.
Have you noticed that, the down-right coner has a little realplayer, I just
like to keep some music on while I am coloring, it' really helps. |
|
|
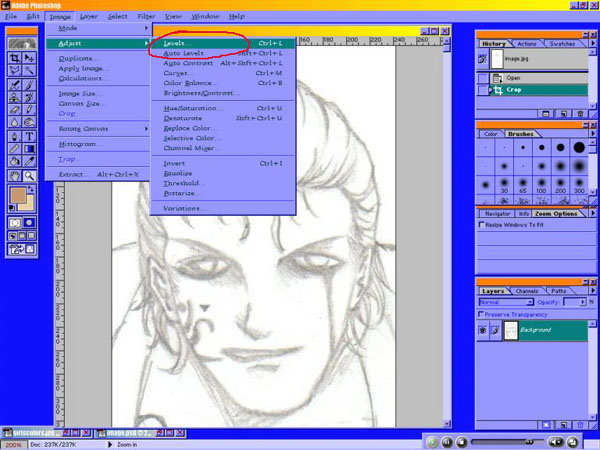
Now you
need to darken up your lines a little bit, go to Image>adjust>levels.
Adjust levels to make the lines dark. But not too dark. |
|
|
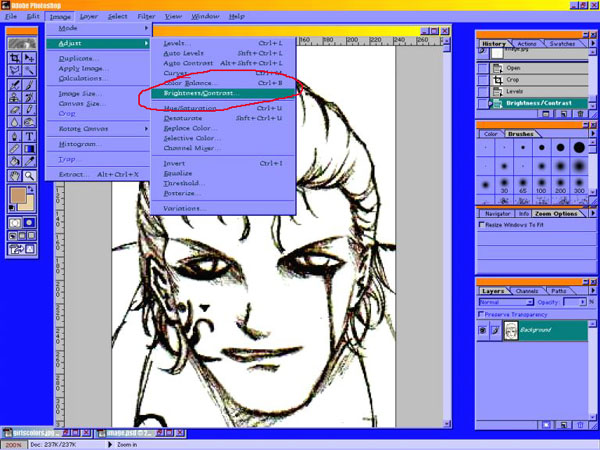
Then
go Image>adjust>levels again, and select Brightness/Contract, use
that to make the dark lines clean, so it's easier to put the colors on.
Then make some layers for the face color, hair color, eyes color, and the
tatoo or whatever needs one. |
|
|
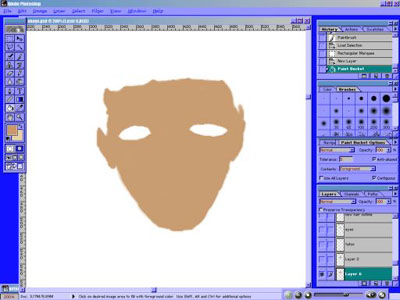
Then
now, use the selecting tool to select the face, you don't have to though,
then use paintbrush to paint the basic face color, or the skin color you
want. I leave the eyes out, but you don't have to, you can just paint it
all over. |
|
|
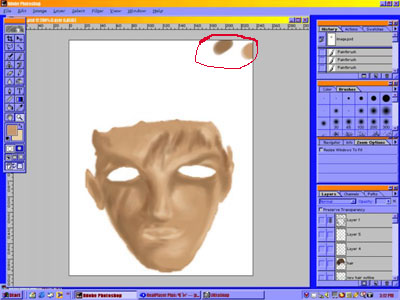
Use a
darker color to painter the shadows on the face, this is where you start
to using the Airbrush, and make sure the presure sencitive is checked. And
use a lighter color to color the lighter areas. Keep in mind where the light
is coming from. You can paint your colors for the lighten area, and the
darken area's color on a coner, so you don't have to go to colors every
time you want to change use them. |
|
|
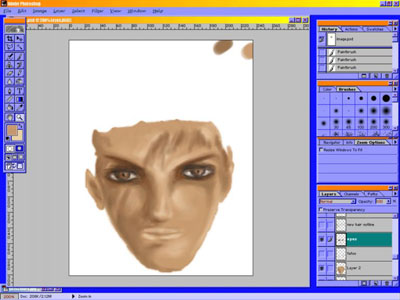
After
you paint the face, work on the eyes on another layer, and as you see the
two holes I left out is where the eyes are, and I didn't really use the
line art on this coloring that much, didn't follow the sketch. You will
see what I am talking about. |
|
|
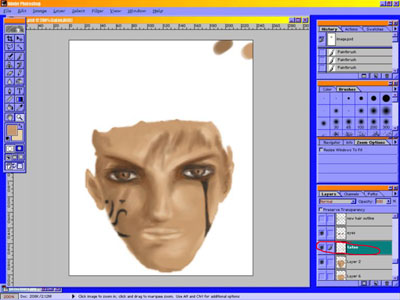
After
that, paint the tatoos, make the line art visible, so you can see how the
tatoo goes, and paint it on a seperate layer, and make it dark and clean. |
|
|
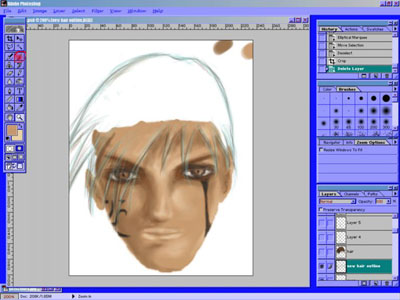
Now,
this is where I did the changes to this drawing, I didn't like the hair
I did on the sketch, so I redraw the hair use paintbrush, instead of paint
the original hair. I did it on a new layer, first I was just want to see
how it look, then I feel this is better than the original one. So I use
this. |
|
|
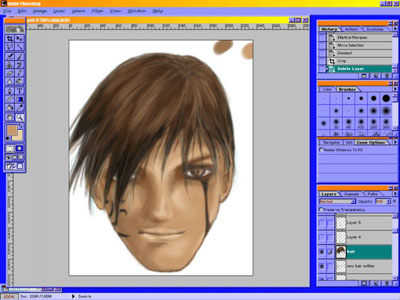
After
I did the outline of the new hair, paint the hair with airbrush first, then
use paintbrush to make the hair look more real. As you see, hair is the
hardest part for me on thise drawing. But I think I did it ok. Well you
have keep in mind where the shines on the hair should be. And after you
done with the hair. redraw the outline of the face, and do a little touch
up the the lip, nose, and ear, then you done with it. |
| |
|